One of the recommended ways to improve website performance is to configure file compression and caching.
- Compression is used to transfer static files - javascript, css styles, fonts, and more. With compression enabled, the web server transmits the files in compressed form, and adds the Content-Encoding header
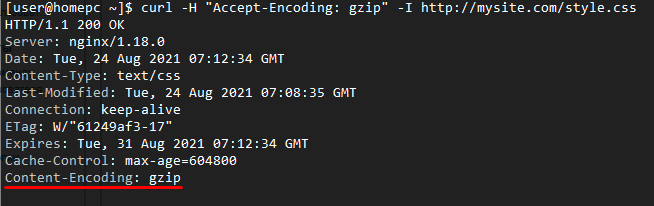
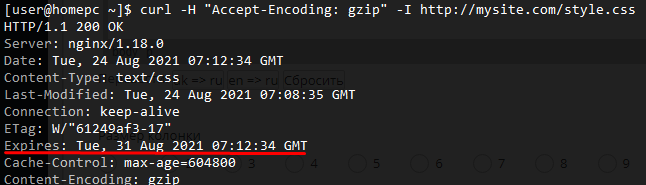
- When caching is enabled, the server sends the Expires header, which tells the browser that the downloaded file can be saved in the cache. When re-accessing the file, the browser will not download it, but will take it from the cache. Client-side caching applies to javascript, css files, images and other static files. This feature increases the speed of loading and displaying the site in the browser significantly.
For any site, the optimal configuration of compression and caching of static files is already defined by default.
Sample nginx config:
However, if you need more precise customization, you can override the types of static files for which this configuration will be applied. For this:
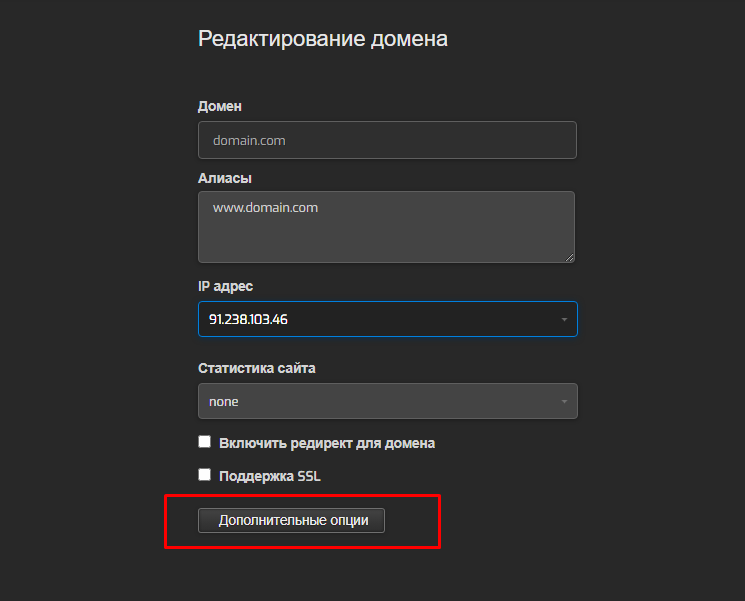
The setting should be done in the PHP hosting control panel https://php.realhost.pro:8083
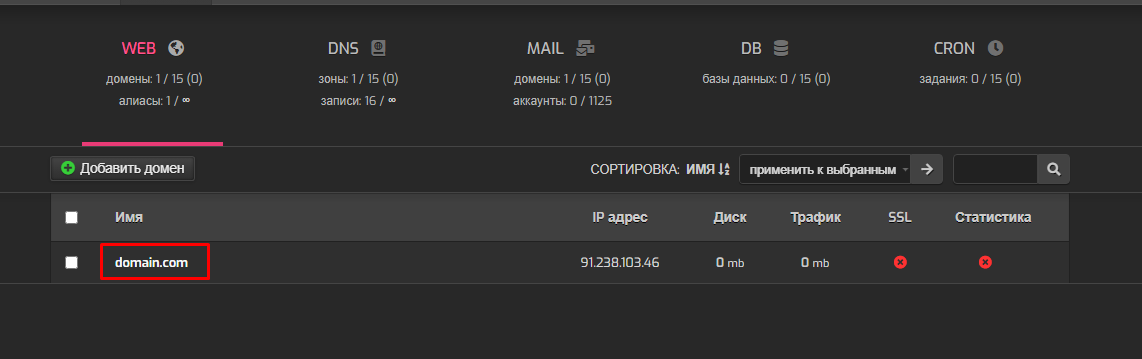
1. Select a domain in the WEB section
2. Click the "More options" button
3. In the "Proxy Processing" field, specify the list of file types for caching
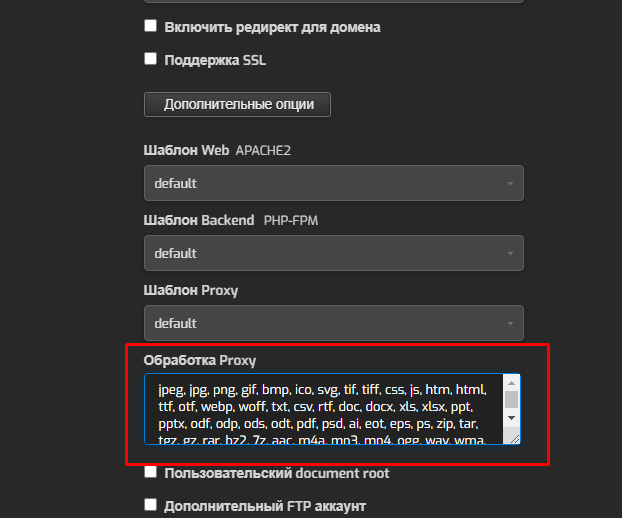
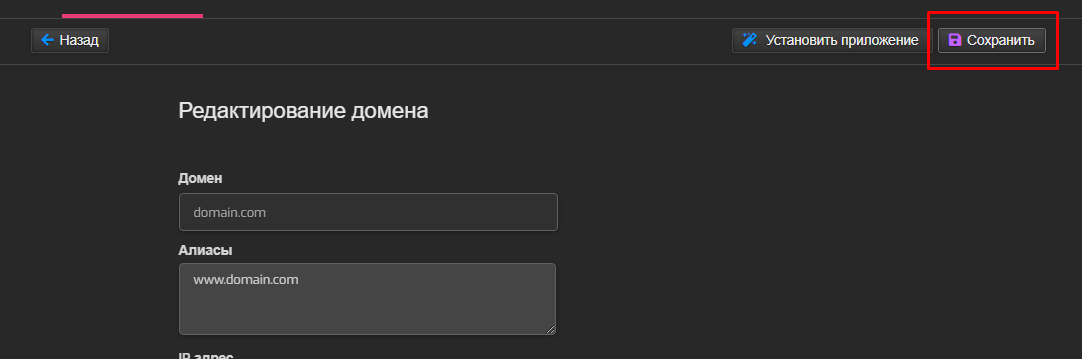
4. When finished, click the "Save" button